

Remove Window Film in 15–20 Minutes per Pane: Safe for Homeowners & DIYers
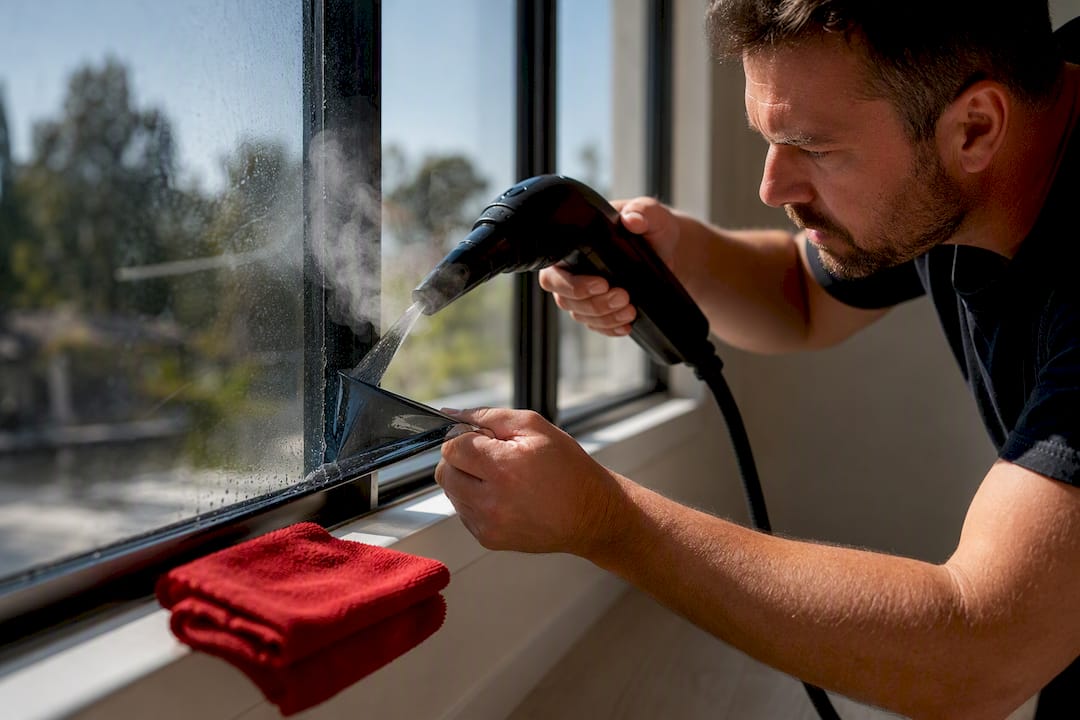
Yes, you can remove window film yourself on most single-pane residential windows and recent film installations, using moist heat and a slow, low-angle peel. Stop immediately and call a professional if the glass is tempered, part of an insulated glass unit (IGU), or if the film is over a decade old. Before you touch a blade, have three things ready: a steamer or hairdryer, a plastic scraper, and isopropyl alcohol.
TL;DR:
- DIY removal is safest on single-pane windows with film under five years old, taking around 15 to 20 minutes per 15-square-foot pane with moist heat.
- Using a handheld steamer is the recommended method; avoid prolonged use of heat guns to prevent cracking, especially on older or stressed glass.
- Residue removal typically starts with isopropyl alcohol; for stubborn spots, acetone can be used carefully after testing, with large areas treated via soak-and-cover techniques.
- Avoid DIY on film over 12 years old, on insulated glass units, or large commercial panes, as improper removal risks seal damage or glass breakage.
- After removal, thoroughly clean the glass with alcohol and a non-ammonia cleaner, and wait at least 24 hours before reapplying film or calling a professional.
Table of Contents
- Why Window Film Fails and Gets Harder to Remove Over Time
- Steamers, Heat Guns, Soapy Water, or Chemical Soaks: Which Wins?
- How to Remove Window Film Step by Step
- Getting Rid of Leftover Adhesive Residue
- Removing Tint from Car Windows: What’s Different
- When DIY Stops Making Sense
- Final Cleaning Before You Reinstall or Call It Done
- What to Do With Old Film and Adhesive Waste
- Behind the Blade: What Actually Trips Up DIY Removal
- Get Professional Tint Removal Without the Guesswork
- Sources
- FAQ
Why Window Film Fails and Gets Harder to Remove Over Time
Bubbling, purple discoloration, and cloudy haze are the three signs that tell you film has failed and needs to come off, not just get cleaned. Edge lifting is another giveaway, usually starting at a corner and creeping inward.
Film doesn’t fail evenly. The adhesive bond actually gets stronger with age and UV exposure, which is part of why window films are installed in the first place as UV protection, then ironically becomes tougher to strip once that same UV load bakes the glue onto the glass over years of sun exposure.
- A single 15 square foot pane with film under 5 years old: roughly 15 to 20 minutes with moist heat
- The same pane with film 10 to 15 years old: 30 to 45 minutes, often with adhesive residue left behind
- Film with visible haze or crumbling edges: budget an hour or more, and expect scraping in stages
Steamers, Heat Guns, Soapy Water, or Chemical Soaks: Which Wins?
A handheld steamer is the safest default for homeowners. Moist heat loosens the adhesive gradually without scorching the glass or your fingers, and it works on nearly every film type without much risk of gouging the surface.
A heat gun or hairdryer works faster, but it demands more attention. Hold it too long in one spot and you risk cracking the glass from uneven thermal stress, especially on older or already-stressed panes. Keep the tool moving constantly.
For newer film, plain soapy water is worth trying first. A simple soak, lift, and rinse sequence with warm water and a few drops of dish soap softens fresh adhesive without any solvent at all.
Chemical removers, acetone, and isopropyl alcohol handle the stubborn residue that heat alone won’t touch, though acetone in particular needs to stay well clear of IGU seals.
- Steamer: safest, slowest, best for beginners
- Heat gun: fast but requires constant motion to avoid hotspots
- Soapy water: low risk, works best on film under 2 years old
- Solvents: strongest option for leftover glue, but seal-sensitive
Pro Tip: Test any solvent on a hidden corner first. Some tinted or coated glass reacts differently than clear glass, and you want to find that out on an inch you don’t care about.
How to Remove Window Film Step by Step
Start by identifying your glass type. Single-pane glass is the most forgiving surface for DIY work. If you’re not sure whether you’re looking at an IGU, check for a spacer bar visible between two panes at the edge, which signals a sealed double-pane unit that changes your risk calculus entirely.
Lay towels along the sill to catch drips, then gather your tools: a single-edge razor scraper, a plastic scraper for edge work, a steamer or spray bottle of soapy water, microfiber cloths, and isopropyl alcohol.
- Warm the glass. Run the steamer over a small section for 30 to 60 seconds, or mist it generously with soapy water.
- Score a corner tab. Use the razor at roughly a 30 degree angle to lift a small starting flap, working only on the film, never gouging the glass.
- Peel slowly at a low angle. Pull the film back on itself rather than straight off the glass, keeping the surface wet as you go.
- Re-wet as needed. If the film starts to tear, stop, re-apply heat or soapy water, and resume from that spot rather than yanking.
- Switch blades often. A dulling blade is what causes most of the micro-scratches people blame on the removal method itself.
- Wipe as you clear each section, so residue doesn’t dry and re-harden before you get to it.
Keeping the glass wet through the entire peel is the single biggest factor separating a clean job from a scratched one. Dry scraping is where most DIY jobs go wrong.
Expect 20 to 40 minutes per pane for straightforward jobs, longer for anything with heavy haze or brittle edges.
Getting Rid of Leftover Adhesive Residue
Isopropyl alcohol is usually your first move on leftover glue. It’s less aggressive than acetone, cuts through most residue, and won’t damage most window frame finishes if you’re careful with drips.
Acetone works faster on tough spots but it’s harsher, so test it in a corner before going over the whole pane. Apply either solvent with a cloth rather than pouring it directly, and keep liquid at least a couple centimeters back from any IGU edge to avoid softening the seal.
For large panes or residue that just won’t budge, Gila’s manufacturer instructions outline a soak-and-cover method: spray the remover, cover the area with plastic to trap moisture, wait 20 to 30 minutes, then test and peel. This works well because it stops the solvent from evaporating before it fully breaks down the glue.
- Start with isopropyl alcohol on a cloth, not a direct pour
- Move to acetone only if alcohol isn’t cutting it, and test first
- Cover large soaked areas with plastic wrap to lock in moisture
- Repeat short dwell cycles rather than scrubbing harder each pass
Repeated short soaks beat one long, hard scrub every time. Scrubbing aggressively to save time is exactly how people scratch glass they’d otherwise have removed cleanly.
Removing Tint from Car Windows: What’s Different
Car glass adds a wrinkle that residential windows don’t have: defroster wires baked onto the rear window’s interior surface. Any metal scraper dragged across those thin wires can snap them, and repairing a defroster grid costs far more than the tint removal itself.
Mask the wires with tape before you start, and stick to plastic tools whenever you’re working near them. Mechanical scraping near defroster wires is the highest-risk move you can make on a rear window; a solvent-soaked paper towel and gentle rubbing does the same job without the risk.
- Interior temperature matters: aim for 65 to 75°F, since adhesives release more easily in that range
- Use a small handheld steamer rather than a full-size unit in a cramped cabin
- Tape off door seams so solvent doesn’t run down into the door cavity
- Wait at least 24 hours after removal before applying new film
When DIY Stops Making Sense
A few conditions should make you set the razor down and pick up the phone instead. Film older than about 12 years, visible haze trapped inside a double-pane unit, tempered or laminated glass, and any large commercial storefront pane all raise the stakes considerably.
The most common DIY failures aren’t dramatic, they’re small. Micro-scratches from a dry, dull blade. A softened IGU seal from solvent that crept too close to the edge. Occasionally, a full crack from thermal shock when a heat gun lingers too long on cold glass.
- Film is more than roughly 12 years old
- The pane is part of a sealed double-pane (IGU) unit
- Glass is tempered, laminated, or you’re unsure which type you have
- The job involves large or vertical commercial glass
Pro Tip: If you can’t tell your glass type by looking at the edge spacer, treat it as an IGU until proven otherwise. Guessing wrong is how seals fail.
Professional removal exists precisely for these edge cases, and Twtwindowfilm backs its installations with a lifetime warranty, which matters when a botched DIY removal is what forces the reinstall in the first place.
Final Cleaning Before You Reinstall or Call It Done
Once the film and residue are gone, finish with a wipe of isopropyl alcohol followed by an ammonia-free glass cleaner and a microfiber cloth. Work in a zig-zag pattern from top to bottom so you’re not just pushing streaks around.
Check your work at a low angle in direct light. Scratches and leftover haze both show up far more clearly this way than they do head-on.
- Wait at least 24 hours before applying new film
- Some manufacturers recommend 48 to 72 hours for ammonia-free cleaning and cure time on the freshly cleaned glass
- Ceramic and premium films can need 3 to 7 days of cure time once reinstalled
- If the pane looks scratched or hazy under inspection, that’s your cue to call a pro before reinstalling anything
What to Do With Old Film and Adhesive Waste
Removed window film isn’t something you toss loose into the trash and forget. Most residential and automotive tint is a multi-layer polyester laminate, sometimes with a metalized or dyed coating, and it doesn’t break down in a landfill the way paper or cardboard does.
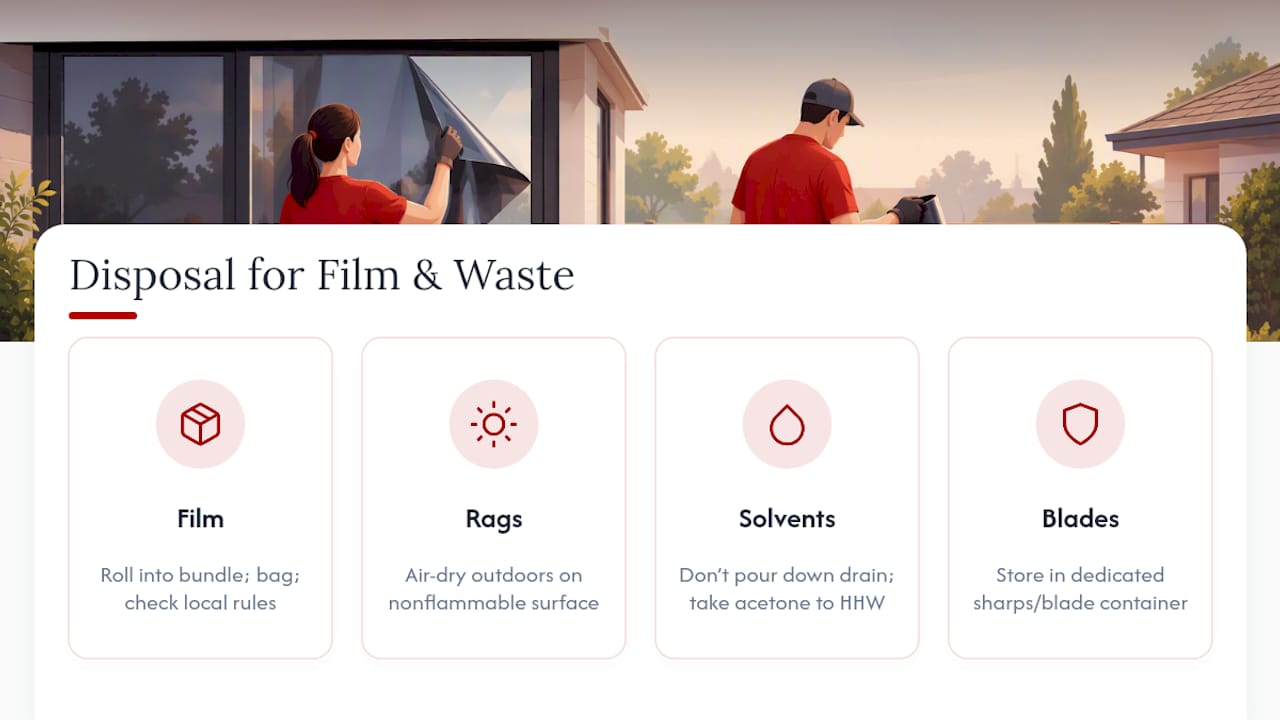
Roll the removed film into a manageable bundle rather than leaving it in loose sheets. This keeps sharp edges contained and makes it easier to bag for disposal. Most municipal waste programs accept film-based plastics in regular household trash, but check your local recycling guidelines first, since some areas route polyester films differently than they route plastic bags or bottles.
Solvent-soaked rags and paper towels need their own handling. Isopropyl alcohol and acetone are both flammable, and a pile of solvent-damp rags left in a closed trash can is a real fire risk if it happens in a hot garage. Let rags air-dry outdoors on a nonflammable surface before disposing of them, or store them in a sealed metal container until trash day.
Leftover solvent itself shouldn’t go down a household drain. Small amounts of isopropyl alcohol are generally fine in most municipal systems, but acetone and commercial adhesive removers are better taken to a household hazardous waste collection site if your area has one. If you’ve got adhesive remover left in the spray bottle, use it up on a second pane rather than pouring it out.
Old razor blades go in a dedicated sharps or blade disposal container, never loose in a trash bag where they can cut someone handling the bin later.
Behind the Blade: What Actually Trips Up DIY Removal
Impatience causes most of the damage we see, not lack of skill. People rush the peel before the adhesive has softened, then force it and gouge the glass. Slow down, stay wet, and stay honest about your glass type.
— Jake
Get Professional Tint Removal Without the Guesswork
If your window film is old, your glass is part of an insulated unit, or you’re staring down a wall of commercial storefront panes, hiring it out isn’t giving up, it’s the move that actually protects the glass. Professional tint removal services are available for homes and businesses in Southern California, often using premium brands like 3M and LLumar, with installation warranties offered.

That matters most on the jobs DIY handles worse: large vertical commercial glass, double-pane units where a solvent mistake can crack a seal, and film old enough that nobody’s sure what’s underneath it anymore. Crews typically handle both removal and reinstall as one job, with no subcontractors involved. If your situation matches any of the red flags covered above, get a free on-site estimate through the tint removal service page and get a clear, written quote before anyone touches a blade.
Sources
For readers who want the manufacturer language directly, Gila’s adhesive remover instructions and 3M’s product care guide cover the technique and timing claims referenced throughout this guide.
- Gila Film Remover Instructions_English
- How to Remove Window Film Without Damaging Your Windows - Ecovision Window Films
- How to remove glued sticker from glass
- Product Care Guide for Window Tint
FAQ
Can I Remove Window Film Myself?
Yes, for most single-pane residential windows and film under about 10 years old, using moist heat and a slow peel while keeping the glass wet. Stop and hire a professional if your glass is tempered, part of an insulated unit, or the film shows heavy haze.
What’s the Best Tool for Removing Old Window Film?
A handheld steamer is the safest starting tool because it loosens adhesive gradually without the scorch risk a heat gun carries. Pair it with a plastic scraper for edges and isopropyl alcohol for leftover residue.
How Do I Remove Sticky Residue After Peeling Off Film?
Wipe the area with isopropyl alcohol first, moving to acetone only if the residue resists and after testing it on a small corner. For large panes, the soak-and-cover method of spraying remover and sealing it under plastic for 20 to 30 minutes works especially well.
Is It Safe to Use a Heat Gun on Car Windows?
Use a small handheld steamer instead where possible, and if using a heat gun, keep it moving constantly and away from any defroster wires on the rear window. Working at an interior temperature of roughly 65 to 75°F helps the adhesive release without added heat risk.
When Should I Hire a Professional Instead of DIY?
Call a professional if the glass is tempered, part of a double-pane insulated unit, or the film is older than about 12 years with visible haze. Twtwindowfilm offers professional tint removal throughout Orange County and Los Angeles County, backed by a lifetime warranty on any reinstall.