

Patio Door Window Film: What to Buy and How to Install It
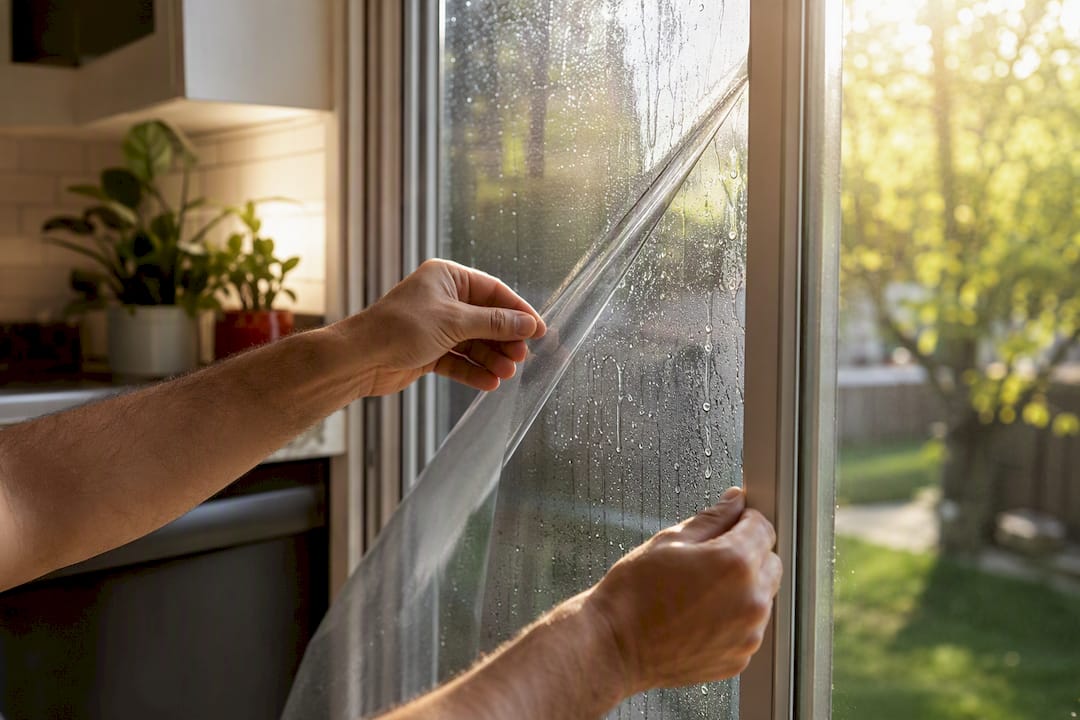
Patio door window film is the fastest, lowest-cost way to cut heat, glare, and nosy sightlines through a sliding glass door. For heat and UV damage, ceramic film is the right call. For daytime privacy without losing light, go frosted or a light ceramic tint. For nighttime privacy too, you need something darker or a professional consult, because one-way films lose their trick after dark.
DIY kits handle standard sliding doors just fine, especially the common 76 inch tall panels sold at most hardware stores. Call a professional when the glass is oversized, the frame has curves or grids, or you’re installing security film where a bad seal defeats the purpose.
Before buying anything, do two things:
- Measure each glass panel’s exact height and width, not the door frame.
- Decide your primary goal first: heat reduction, daytime privacy, decorative style, or security. That answer determines which film category you shop for.
Key Takeaways
Patio door window film delivers heat reduction, glare control, and privacy fastest through ceramic or frosted film, while security and warranty-critical jobs call for professional installation.
| Point | Details |
|---|---|
| Match film to your goal | Choose ceramic for heat and UV, frosted for permanent privacy, reflective only if nighttime privacy doesn’t matter. |
| Measure before you buy | Measure each glass panel individually since precut kits only fit standard, unmodified dimensions. |
| Watch the nighttime mirror flip | One-way reflective films reverse once interior lights outshine the outdoor light after dark. |
| Clean glass thoroughly | Residue and dust under the film cause the majority of DIY bubbling complaints. |
| Hire a pro for security or warranty needs | Twtwindowfilm offers 3M and LLumar film with a lifetime warranty and free on-site assessments across Orange County and LA County. |
Table of Contents
- Types of Patio Door Window Film and What They Actually Solve
- What Do VLT and Heat Rejection Numbers Actually Mean?
- Precut Kits, Custom Film, or a Professional Install: How to Decide
- How to Install Patio Door Window Film Yourself
- Common DIY Mistakes That Ruin a Good Film Job
- How Long Does Patio Door Film Last, and How Do You Maintain It?
- What Does Patio Door Film Cost, and What’s the Payback?
- Why Professional Installation Still Matters for Bigger Jobs
- Is Window Film Recyclable, and How Does It Affect the Environment?
- Will Window Film Work on Your Door’s Glass and Frame?
- The Real Judgment Call Behind Every Film Purchase
- Ready for a Film That’s Actually Built for Your Door?
- Sources
Types of Patio Door Window Film and What They Actually Solve
Not all patio door tint solves the same problem, and picking the wrong category is the single biggest reason DIY installs disappoint people. Match the film to the actual complaint, not just the marketing copy on the box.
Ceramic film is the closest thing to a universal answer. It uses nano-ceramic particles instead of metal or dye, which lets it block a large share of solar heat and UV rays while staying close to invisible. It doesn’t interfere with cell signals or WiFi the way older metallic films sometimes did, and it keeps your view outside looking natural rather than tinted or mirrored.
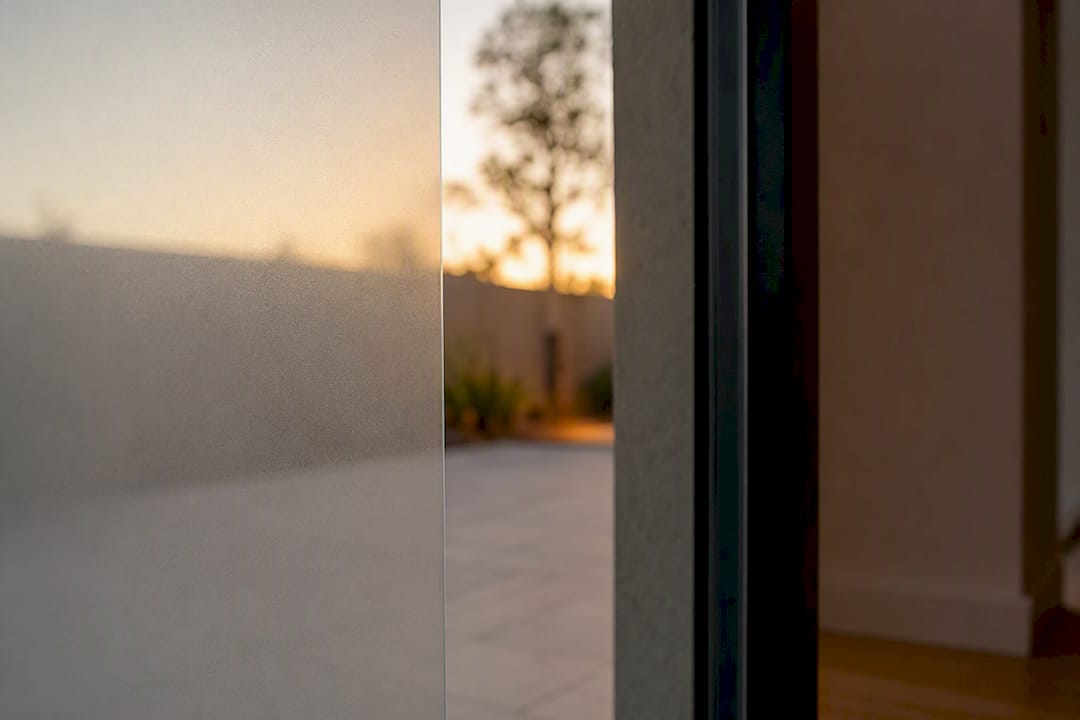
Reflective or metalized film gives you stronger daytime privacy and knocks down more glare because it bounces sunlight back outward. The catch: at night, once your living room lights are on and it’s darker outside, the mirror effect flips. Retailers selling one-way privacy films state this plainly in their own product listings, warning that interior lighting reverses the daytime privacy effect once the sun goes down. If your patio door faces a lit backyard or a neighbor’s porch, plan for that.
Frosted or decorative film trades transparency for permanent privacy and a design element. It diffuses light instead of blocking it, so rooms stay bright without anyone seeing in, and you can find patterns, etched looks, or full opacity depending on style.
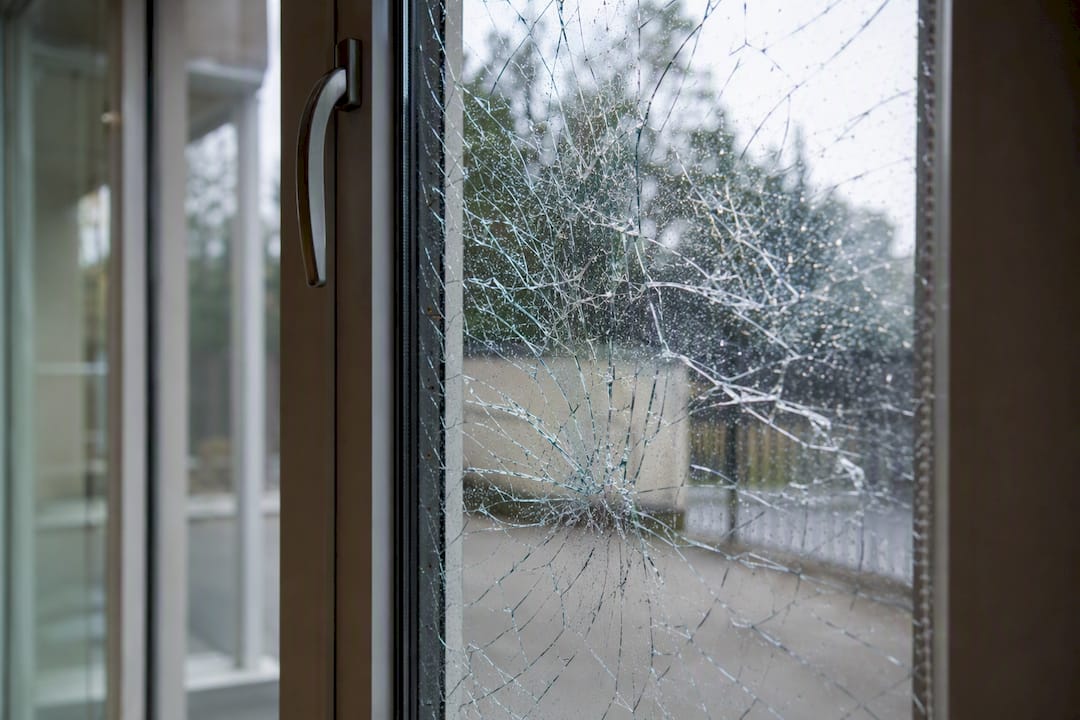
Security film is thicker and built to hold shattered glass together, adding a real deterrent against break-ins and storm damage rather than just a cosmetic upgrade.
Static-cling vs. adhesive comes down to commitment. Static-cling films use water tension to grip the glass, so they’re removable and forgiving for renters, but they tend to shift, trap air more easily, and don’t last as long. Adhesive films bond permanently and hold up far better over years of sun and temperature swings.
Pro Tip: If you’re unsure between ceramic and reflective, default to ceramic. It solves heat and UV without creating the nighttime mirror problem that trips up so many first-time buyers.
What Do VLT and Heat Rejection Numbers Actually Mean?
VLT stands for visible light transmission, and it’s the single number that tells you the most about how a film will look and feel. A higher VLT (say, 50%) lets in more natural light and keeps your outdoor view clear; a lower VLT (20% or less) darkens the room and blocks more sightlines, which matters if privacy is your top priority.
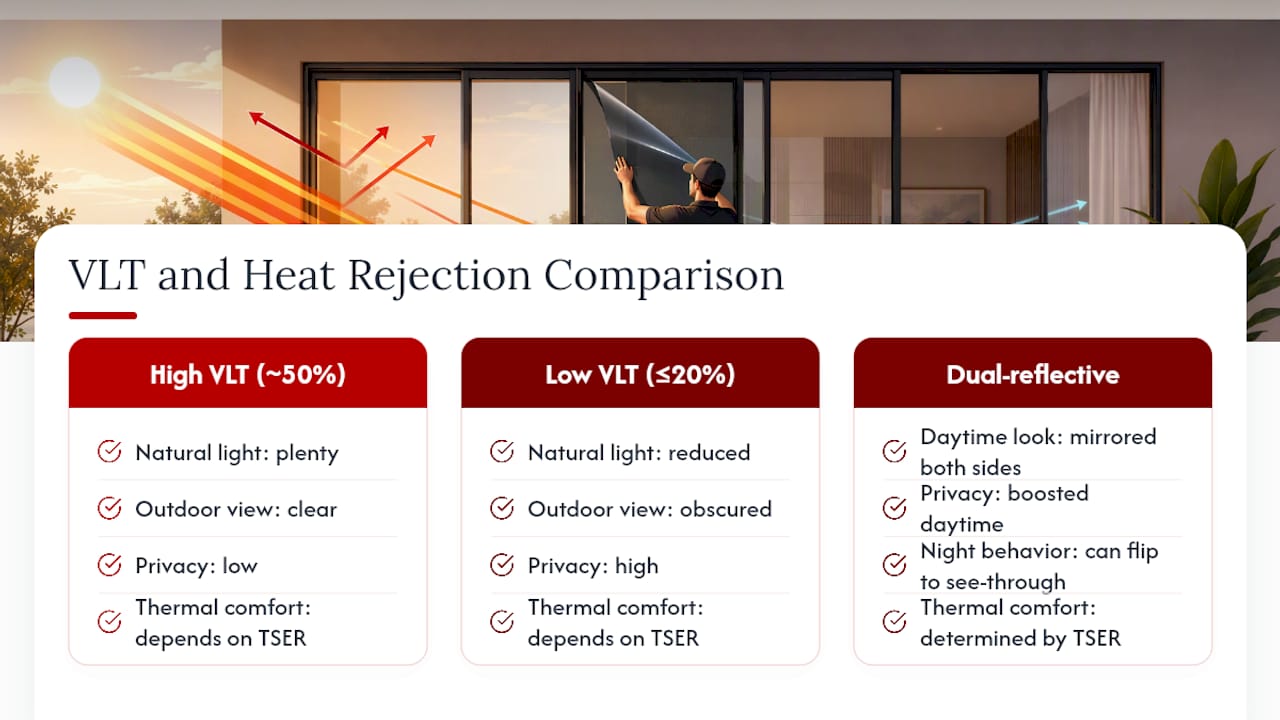
Heat rejection numbers, sometimes labeled TSER (total solar energy rejected) on spec sheets, describe how much solar heat energy the film keeps from passing through the glass. This is the figure that connects most directly to comfort, since it determines whether that west-facing patio door turns your living room into a greenhouse every afternoon.
UV-blocking percentages matter for a different reason: fading. Sun exposure through untreated glass is a major cause of faded hardwood floors, sofas, and artwork, and quality solar films block the large majority of UV rays that cause that damage over time.
One spec worth double-checking before you buy: whether a film is “dual reflective” or “neutral.” Dual-reflective films create that mirror look from both sides during the day, which boosts privacy but is also the type most likely to flip into a see-through window once your interior lights outshine the sun.
Precut Kits, Custom Film, or a Professional Install: How to Decide
Most standard sliding patio doors use glass panels close to a common size, and precut kits sold at major retailers are cut to fit those dimensions without trimming. If your panels are unmodified builder-grade glass, a precut kit is almost always the cheapest and fastest route.
Custom-cut film becomes necessary the moment your door doesn’t match the standard mold. French doors with multiple small panes, doors with muntin bars, oddly sized replacement glass, or anything installed before modern sizing conventions took over will need film ordered to measurements rather than pulled off a shelf. Checking standard door sizing guidance before you order saves you from a kit that’s an inch short on every edge.
Professional installation earns its cost in three specific situations:
- You want security film, where seam quality and edge adhesion directly determine how well the film resists forced entry.
- You want a warranty that actually means something if the film bubbles, peels, or discolors years down the road.
- The job involves multiple large panels, curved glass, or tight corners where a DIY mistake means buying a second kit.
Cost-wise, DIY kits are the budget option, custom film costs more per square foot, and professional jobs cost the most upfront but typically deliver a cleaner finish with fewer bubbles and a warranty backing the work.
How to Install Patio Door Window Film Yourself
Here’s the honest sequence, start to finish, for a standard sliding door panel.
Time estimate: 45 to 90 minutes per panel, depending on size and how many bubbles you fight along the way.
Tools and materials checklist:
- A hard-card squeegee (not a credit card, which flexes too much)
- A spray bottle with a mild soap and water solution
- A sharp utility knife with extra blades
- Lint-free towels or a microfiber cloth
- A razor scraper for stubborn residue
- Painter’s tape to hold film in place while you work
Steps:
- Measure twice. Measure each glass panel independently, height and width, since patio door panels aren’t always perfectly identical even on the same door.
- Clean the glass thoroughly. Spray, scrape with the razor at a low angle, and wipe until zero streaks or residue remain. This step causes more DIY failures than any other, because trapped dust becomes a permanent bump under the film.
- Wet the glass generously. A heavy, even spray of soapy water creates a slip layer that lets you reposition the film before it grabs.
- Position the film. Peel back the liner in small sections, spraying the adhesive side as you go, and lay it onto the wet glass with a couple inches of overlap on all edges.
- Squeegee from the center out. Work in overlapping strokes toward each edge to push out water and air, checking corners last since they trap the most bubbles.
- Trim the excess. Use the utility knife against the edge of the glass, cutting away from yourself, once the film is fully positioned.
- Final squeegee and dry. Go over the whole panel once more, then blot the edges dry with a towel.
- Let it cure. Most films need one to several days to fully bond and clear up any remaining haze.
Small bubbles usually work themselves out during curing. Bigger ones need a needle-sized pinprick and a gentle push toward the nearest edge with the squeegee. If you see edges lifting after a week, or the film keeps shifting no matter how you reposition it, stop before you waste a second kit. That’s usually a sign the glass wasn’t clean enough or the room was too cold during install, and a professional can salvage the job faster than a third DIY attempt.
Pro Tip: Install on a mild, overcast day if you can. Direct sun speeds up drying before you’ve finished positioning the film, which is how most bubbles get permanently trapped.
Common DIY Mistakes That Ruin a Good Film Job
Most failed installs trace back to one of four preventable errors.
- Ordering by guess instead of by sample. A film that looks perfect on a product photo can read far darker or more mirrored once it’s on your actual glass. Order a sample swatch before committing to a full kit.
- Skipping a deep clean. Any leftover residue, hard water spots, or dust becomes a visible bump that never goes away, and rushing this step is the single most common regret DIYers report.
- Installing in the wrong conditions. Cold glass makes adhesive sluggish and hard to reposition; dusty rooms guarantee trapped particles under the film.
- Buying the thinnest film available to save money. Ultra-thin films crease easily during handling and are more prone to delaminating at the edges within a year or two, which erases whatever you saved upfront.
How Long Does Patio Door Film Last, and How Do You Maintain It?
Quality adhesive film typically holds up for many years before fading or edge lifting shows up, while cheaper static-cling versions tend to need replacement sooner.
- Clean it gently. Use a soft cloth and mild soap and water; avoid ammonia-based glass cleaners, which can degrade the film’s coating over time.
- Watch for peeling edges or a hazy center. Both are signs the film has reached the end of its useful life.
- Removal differs by type. Static-cling film peels off with little effort, while adhesive film often needs heat and a scraper to lift cleanly, which is where a professional removal service earns its fee on larger jobs.
- Document your install for warranty claims. Keep your receipt, the film brand, and installation date on file so any coverage claim goes smoothly.
What Does Patio Door Film Cost, and What’s the Payback?
DIY kits for a standard sliding door panel typically run from budget-friendly to moderate depending on brand and film grade, while professional installation costs more upfront but includes labor, precision cutting, and a backed warranty.
The energy savings case is straightforward: less solar heat coming through the glass means your air conditioner runs less during peak afternoon hours, particularly on west-facing doors that take the brunt of late-day sun. Beyond utility costs, film protects flooring and furniture from UV fading, adds privacy without curtains blocking your view, and tends to appeal to future buyers who don’t want to deal with a glaring, hot living room themselves.
- Compare DIY kit pricing against a professional quote before deciding, since the gap is often smaller than people assume once you factor in wasted materials from a failed first attempt.
- Check with your local utility provider or municipality. Some regions offer rebate or efficiency programs for window treatments that reduce cooling load.
Why Professional Installation Still Matters for Bigger Jobs
Twtwindowfilm has been installing window film across Orange County and Los Angeles County since 2008, working with premium partner brands 3M and LLumar rather than generic off-brand rolls. Every installation carries a lifetime warranty, which matters more than it sounds. Film that bubbles or peels in year four is a real cost if you paid for professional labor, and a warranty is what makes that risk someone else’s problem.
A big part of what a professional actually does before touching your glass is assess it. A roughly 30-minute on-site walkthrough, checking door orientation, existing interior lighting, and sightlines from the street or a neighbor’s yard, prevents the single most common regret homeowners report: picking a film that’s too reflective, too dark, or wrong for how the room actually gets used.
The right film choice depends less on brand reputation and more on three things: which direction the door faces, how the room gets lit at night, and what’s visible from outside. Skip that assessment and you’re guessing.
- Est. 2008, locally owned and operated
- Lifetime warranty on all installations
- Partnered with 3M and LLumar for premium film access
- Serves residential, commercial, and institutional properties throughout Orange County and LA County
For jobs involving security film or multi-panel French doors, that upfront assessment through home window tinting services often prevents a costly redo.
Is Window Film Recyclable, and How Does It Affect the Environment?
Most window films are made from polyester (PET), the same base plastic used in many recyclable containers, but the adhesive layers and any metalized or ceramic coatings complicate standard recycling streams. Curbside recycling programs generally don’t accept window film, so the realistic disposal path for most homeowners is regular trash rather than a recycling bin.
The bigger environmental case for film is on the energy side rather than the disposal side. Reducing solar heat gain through a patio door means less strain on air conditioning, which lowers household energy use over the film’s lifespan. For a west-facing sliding door running an AC unit through long summers, that reduced cooling demand adds up over the several years a quality film typically lasts.
Some manufacturers have started offering take-back or specialty recycling programs for large commercial film removal jobs, though this is far less common for a single residential patio door. If environmental impact matters to your decision, the more actionable lever is choosing a longer-lasting adhesive film over a short-lived static-cling option, simply because a film that lasts twice as long means half as much material heading to a landfill over time.
Will Window Film Work on Your Door’s Glass and Frame?
Patio door window film adheres to the glass itself, not the frame, so the door material (vinyl, aluminum, wood, or fiberglass) rarely affects whether film will work. What actually matters is the glass itself.
Standard annealed glass, the type in most older sliding doors, takes film without issue. Tempered glass, required by code in most modern patio doors for safety, also accepts film normally, since tempering affects the glass’s strength rather than its surface.
The one glass type worth flagging is double-pane or insulated glass units (IGUs) with a low-emissivity (low-E) coating already baked into the seal. Adding certain reflective or dark films to some low-E glass can trap additional heat between the panes, occasionally leading to thermal stress cracks in extreme cases. Ceramic films are generally considered safer choices on low-E glass than heavily metalized reflective films for this reason, though checking your specific glass spec sheet or consulting an installer before ordering dark reflective film is the safer move.
Textured, frosted, or patterned glass (common in older French-style patio doors) can make film adhesion trickier since the surface isn’t perfectly flat. Frosted decorative films tend to be more forgiving here since they’re often designed to layer onto textured surfaces, while security films generally need a smooth surface for proper edge sealing.
The Real Judgment Call Behind Every Film Purchase
Most guides treat film selection like a shopping decision: pick a VLT percentage, pick a price, done. That undersells what’s actually happening. The real variable isn’t the film spec sheet, it’s your door’s orientation and what’s on the other side of the glass at 8 p.m.
Conventional advice leans hard on daytime performance, heat rejection, glare numbers, privacy ratings, and mostly ignores that the cheapest, most popular category (one-way reflective static-cling) quietly stops working the moment you turn on a lamp. That’s not a flaw in the film. It’s physics. But nobody puts it on the front of the box.
Here’s what I’d prioritize first: figure out your actual use case before you shop specs. A DIY ceramic kit on a standard door is a genuinely smart weekend project for most homeowners. But the moment security, warranty, or an oddly shaped door enters the picture, the math flips, and paying for a professional walkthrough stops being an upsell and starts being the cheaper option over five years.
— Jake
Ready for a Film That’s Actually Built for Your Door?
If you’ve read this far and realized your patio door has an oversized panel, a low-E coating, or you just want security film installed correctly the first time, that’s exactly the gap Twtwindowfilm fills. You get a locally owned Southern California installer, in business since 2008, working exclusively with 3M and LLumar film rather than the generic rolls sold in big-box aisles, backed by a lifetime warranty that outlasts anything a DIY kit can promise.
That warranty is the real difference. A DIY kit puts the risk on you if the film bubbles in year three. A professional install from Twtwindowfilm doesn’t. Homeowners across Orange County and Los Angeles County get a free on-site walkthrough where an installer actually looks at your door’s orientation and lighting before recommending a shade, rather than guessing from a spec sheet.
If your patio door is a candidate for a warranty-backed upgrade, start with a free residential estimate and get a shade recommendation built around your actual home, not a generic percentage on a box.
Sources
- Walmart product page — Privacy Window Film One Way
- Home Depot — Window film
- One Day Doors & Closets — The luxury of glass interior doors