

9 Steps to Install Decorative Film: Installer Workflow for SoCal Homes
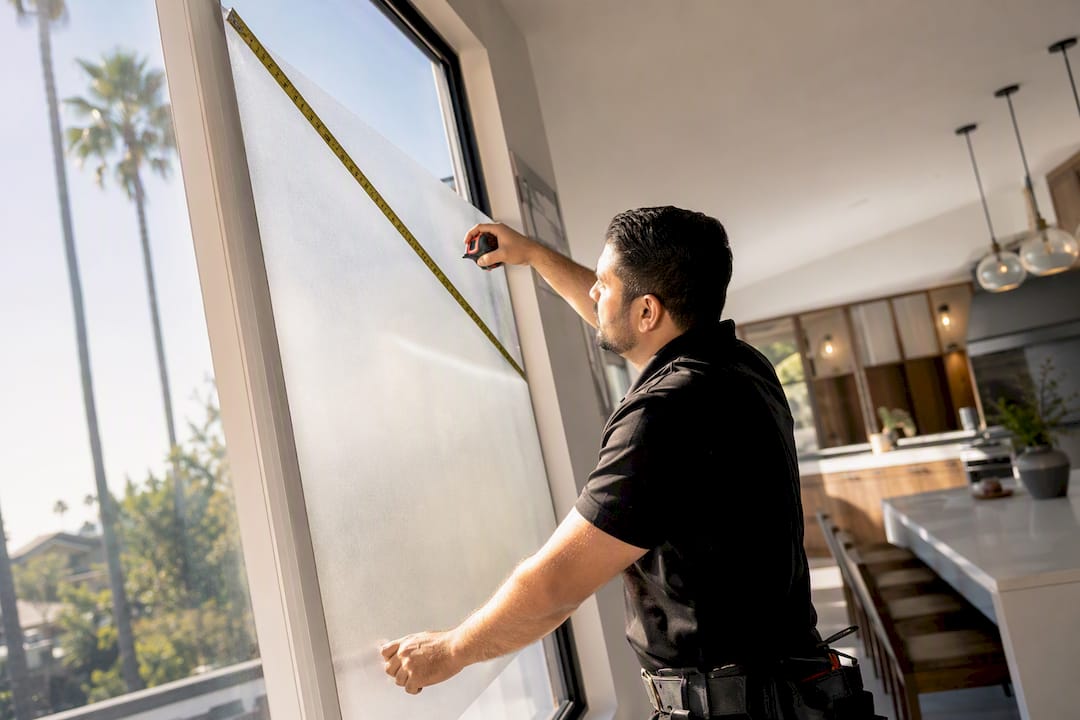
Most decorative window films are well within reach of a careful DIYer, and the outcome comes down to one thing more than any other: a genuinely clean surface, a generous slip solution, and a proper squeegee technique. Skip any of those three and bubbles or peeling edges follow. Security films, oversized commercial panels, and jobs that require a guaranteed finish are better left to a professional installer.
TL;DR:
- Use a proper slip solution with a few drops of dish soap per spray bottle of water and avoid hard or tap water that contains minerals.
- Wet the glass thoroughly before peeling, and peel the film gradually while spraying the adhesive side to prevent dry contact and bubbles.
- For adhesive-backed films, follow manufacturer guidance on water usage to avoid weakening the glue, and static films are more forgiving if kept wetter.
- Bubbles can be fixed by pinching tiny ones with a needle or re-wetting and reapplying larger ones, but persistent edge curling often indicates trapped dirt and requires cleaning.
- For thicker security films or large commercial panels, professional installation is recommended due to special tools, higher skill requirements, and the need for a flawless finish.
Table of Contents
- What Do You Need for Decorative Film Installation?
- How Do You Install Decorative Window Film Step by Step?
- Adhesive-Backed vs. Static-Cling Film: What Changes?
- Why Do Bubbles, Haze, or Curling Happen After Installation?
- What About Thick Films, Acrylic, and Large or Multi-Pane Windows?
- How Do You Clean and Maintain Decorative Window Film?
- Should You DIY This or Hire a Professional Installer?
- How Do You Get a Professional Decorative Film Estimate?
- An Installer’s Honest Take on DIY Decorative Film
- Sources
What Do You Need for Decorative Film Installation?
A successful decorative film installation depends less on fancy equipment than on having the right basic tools and using them correctly. Most of what you need costs under $40 total, and you probably already own some of it.
Tools and materials checklist:
- 32-ounce spray bottle for the slip solution
- Mild, non-moisturizing dish soap (avoid anything with lotion or degreaser additives)
- A flat squeegee, ideally a Blue Max style or similar hard felt-edge tool
- A sharp utility or OLFA-style knife with extra blades
- A hard card or plastic applicator for tucking edges
- Lint-free microfiber cloths
- Low-tack masking tape for temporary positioning
- A single-edge razor blade scraper for stubborn glass deposits
Mix your slip solution before you touch the glass. The standard ratio, drawn from manufacturer installation guides, is a few drops of mild dish detergent per spray bottle of water (https://decorativefilm.com/installation-instructions?srsltid=AfmBOorYGYej6A0R428KiACOK4_0ye5NTNldlA3JMOfu8myBANZMpTgu). If you live somewhere with hard water, use filtered or distilled water instead. Mineral deposits from tap water can leave streaks trapped under the film permanently, which is a frustrating way to ruin an otherwise clean install.
Surface prep matters more than people expect. Wipe the glass down with isopropyl alcohol or a non-ammonia glass cleaner first, then scrape it with a fresh single-edge razor blade held nearly flat against the glass to lift paint flecks, sticker residue, or hard water spots. Let the film itself acclimate flat in the room for about 24 hours before installing, since a film that’s been rolled tight in shipping needs time to relax.
When you measure, go frame-to-frame rather than pane-to-pane, and cut with some extra material on every side. Mark your cut lines on the liner side of the film, never on the face, since even a light pencil mark on the finished surface won’t come out.
How Do You Install Decorative Window Film Step by Step?
The wet-application method is the standard approach for both static-cling and adhesive-backed decorative films, and it’s the same basic sequence manufacturers and major retailers walk through in their own installation guides. Here’s the order that actually works:
- Cut the film to size. Lay it flat, adhesive or static side up, and trim to your measurements plus the oversize allowance.
- Saturate the glass. Spray the window heavily with slip solution, edge to edge, until water is beading and running.
- Peel the liner gradually. Don’t strip the entire backing at once. Peel a few inches at a time, spraying the exposed adhesive or static side as you go so it never touches dry glass.
- Set the top edge first. Position it level along the top of the frame and let the rest hang loosely against the wet glass. Because everything is still slippery, you can slide the whole sheet side to side to square it up.
- Squeegee from the center outward. Start in the middle of the panel and work outward in overlapping strokes, covering roughly half of each previous pass. Use firm, even pressure and keep the squeegee blade wet so it glides instead of dragging.
- Chase out trapped water and air. Work in a rough fan pattern from center to edges, checking corners last since they trap the most residual moisture.
- Trim the excess. Run your hard card along the frame as a guide and cut with the utility knife, leaving about a 1/8 inch gap from the edge of the glass so the film isn’t pinched against the frame.
- Do a final squeegee pass. Go over the entire surface once more to push out any water that crept back in during trimming.
- Wipe down the edges and let it cure. A dry microfiber cloth around the perimeter catches drips before they dry into hard-water spots on the frame.
Squeegee technique is where most first-time installers lose points. 3M’s own technical guidance stresses that the very first pass should remove the maximum amount of water possible, because every pass after that is fighting whatever moisture is left behind. A dull or dirty squeegee blade drags instead of gliding, so swap blades more often than feels necessary.
Pro Tip: Keep a second spray bottle of plain water on hand just for lubricating the squeegee blade between passes. A dry blade catches on the film and leaves streak marks that are almost impossible to fix once the film sets.
Don’t rush the peel-and-position stage. Installer guides consistently point to patience during cleaning and the first squeegee pass as the single biggest difference between a professional-looking result and an amateur one. If the film starts drying before you’ve squared it up, mist it again. There’s no penalty for using more slip solution.
Adhesive-Backed vs. Static-Cling Film: What Changes?
The core technique stays the same for both types, but the amount of water you use and how forgiving the repositioning window is changes quite a bit depending on which one you’re working with.
- Adhesive-backed film uses a water-activated or pressure-sensitive adhesive layer. Some formulations are water-sensitive, so oversaturating the glass can weaken the bond or cause the adhesive to slide unpredictably once dry. Follow the manufacturer’s specific water guidance rather than defaulting to a heavy spray.
- Static-cling film has no adhesive at all. It clings through static and light suction, which means it’s far more forgiving during positioning. Manufacturer FAQ pages generally agree that “wetter is safer” for static films, since extra moisture makes it easier to slide the sheet around and chase out bubbles before it settles.
- Large panels are a two-person job. One person controlling the top edge while the other manages the bottom prevents the sheet from folding onto itself, which is the fastest way to ruin a piece of film mid-install.
- Temperature matters more than people think. Aim for a room and glass temperature between 60 and 80°F. Installing in direct, strong sunlight causes the slip solution to evaporate before you finish squeegeeing, which shortens your working window and invites bubbles.
Why Do Bubbles, Haze, or Curling Happen After Installation?
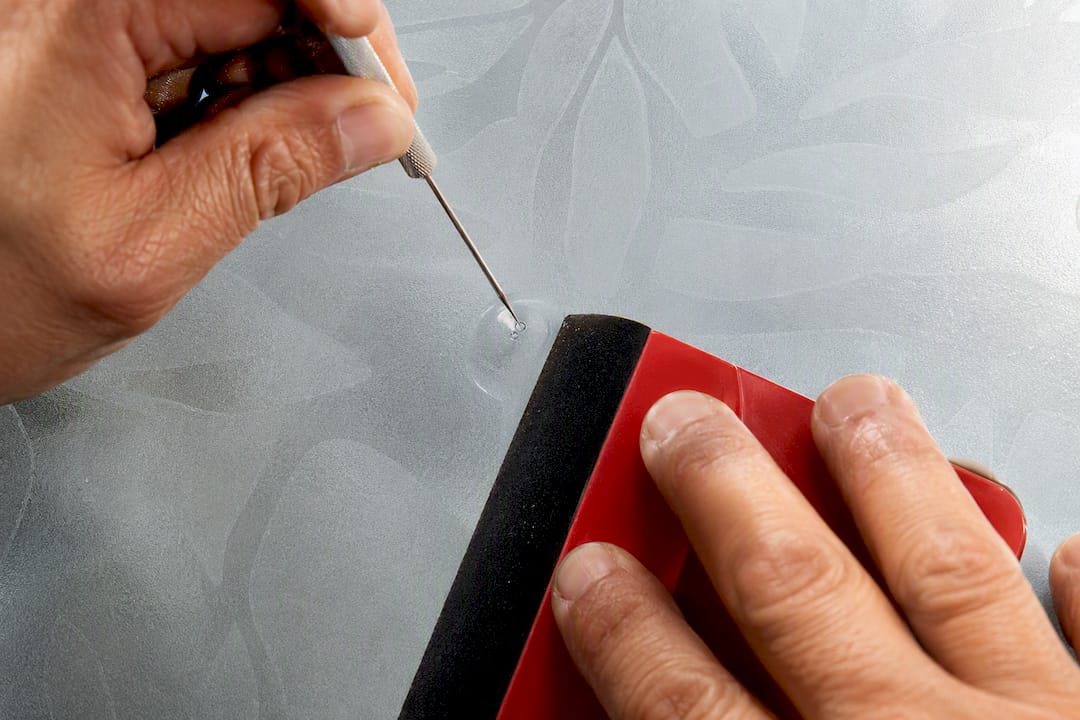
Bubbles are the most common complaint, and the fix depends on their size. Tiny bubbles, especially ones near the edges, usually respond to a pin prick with a needle followed by a firm squeegee pass to push the trapped air out through the hole. Larger bubbles need a different approach: lift that section of film gently, re-wet the glass and adhesive underneath, and reapply with a fresh squeegee pass working outward from the center of the bubble.
Some visible haze or a milky white tint right after installation is normal, not a sign of failure. Moisture trapped between the film and the glass takes time to fully evaporate through the adhesive, and depending on film thickness and indoor humidity, that process can take anywhere from several days to a few weeks. Give it time before judging the final look.
Edge curling usually points to leftover moisture or a weak final bond at the perimeter. Try re-squeegeeing the edges with a towel wrapped around the blade for extra grip, or apply gentle, even heat from a hair dryer set to warm (never hot) held several inches back to help the adhesive re-bond.
Pro Tip: If an edge keeps lifting after two attempts at re-squeegeeing and warm air, stop fighting it. Persistent lifting at the same spot usually means dust or a residue speck got trapped underneath, and the fix is peeling that section back, re-cleaning the glass, and reapplying rather than repeatedly reheating the same corner.
- Small, scattered bubbles: pin-and-squeegee
- Large bubbles or wrinkles: lift, re-wet, and reapply
- Persistent edge curling after two fixes: remove and start that section over, or call a professional installer
What About Thick Films, Acrylic, and Large or Multi-Pane Windows?
A handful of situations change the calculus enough that DIY stops being the obvious choice.
- Security and safety films thicker than about 6 mil trap far more moisture underneath than standard decorative film, which means the first squeegee pass has to do more work and the margin for error shrinks. 3M’s technical guidance notes that films above that thickness require specialized squeegees and firmer, two-handed pressure, and this is exactly the category where installers most often recommend hiring a pro rather than DIY. If you’re weighing a security film project, it’s worth reading through what a professional security film install actually involves before committing to doing it yourself.
- Acrylic and plexiglass surfaces behave differently than glass. Use more slip solution than you would on glass, since acrylic doesn’t hold moisture the same way, and never use a hot hair dryer to fix curling. Acrylic expands with heat and can warp or trap outgassing under the film; avoid using hot air for corrections.
- Splicing on oversized windows requires either an overlap-then-cut-through technique for a tight seam, or a butt splice using two factory-cut edges. Use the same roll for the entire window whenever possible. Switching rolls partway through can leave a faint visible line where tint shades don’t quite match.
- Double-pane and insulated glass is compatible with most decorative films, but always confirm the manufacturer’s specific recommendation first, since some films aren’t rated for certain glass assemblies.
How Do You Clean and Maintain Decorative Window Film?
Give the film time to finish curing before you clean it. Depending on the product, that’s typically anywhere from 48 to 72 hours up to a full week, so check the manufacturer’s specific window rather than guessing.
- Clean with a non-ammonia glass cleaner and a soft microfiber cloth.
- Skip abrasive pads, scrapers, or harsh solvents. They scratch decorative surfaces and shorten the film’s life.
- If you notice sticky adhesive residue at the edges, a diluted soapy water solution or isopropyl alcohol on a soft cloth usually lifts it without damaging the film.
- Watch for tears, edges that keep lifting after repair attempts, or discoloration that spreads over time. Those are signs it’s time to remove and replace rather than keep patching.
Should You DIY This or Hire a Professional Installer?
Run through a short checklist before you commit to doing this yourself: How large is the panel? How thick is the film? How tight is your tolerance for a flawless, bubble-free finish? How much time and hand-eye coordination can you realistically put into it? And do you need a warranty backing the work?
If you answered “large,” “thick,” “very tight,” “not much,” or “yes” to any of those, a professional installer starts to look like the better investment. This is exactly the gap professional installers fill for homeowners and business owners across Southern California. Established in 2008, the locally-owned company has spent years handling installations that go beyond what a confident DIYer should attempt solo.
A few things set a professional install apart from a weekend DIY project:
- Professional installations often include a warranty backing the workmanship, providing coverage beyond what DIY projects typically offer.
- Professional installers use materials from established manufacturers, offering access to film grades and performance specs beyond typical retail products.
- Crews handle the exact situations where DIY risk climbs fastest: oversized commercial glass, security-rated film, and jobs with a strict finish tolerance for retail or office spaces.
Manufacturer video walkthroughs, like
, are genuinely useful if you’re a visual learner working through your first small DIY panel. But once the job scales up in size or thickness, the math shifts toward hiring it out.
How Do You Get a Professional Decorative Film Estimate?
If your project has crossed into “call a pro” territory, whether that’s a security film upgrade, a wall of commercial glass, or a finish that has to be flawless the first time, Twtwindowfilm gives you a faster, lower-risk path than trial-and-error with a squeegee. The advantage over going it alone isn’t just skill. It’s the lifetime warranty backing the work and direct access to premium 3M and LLumar film lines that aren’t sold at retail counters.

Twtwindowfilm handles both residential and commercial decorative film projects throughout Orange County and Los Angeles County, and every quote starts with a free on-site estimate so you know the scope and cost before anything gets scheduled. If your project fits the profile of a large span, a security-rated film, or a space where the finish has to meet commercial specs, request an estimate through the residential decorative film page or the commercial services team, and get a firsthand read on what the job actually requires before you buy a single roll of film.
An Installer’s Honest Take on DIY Decorative Film
The mistake I see people make most isn’t a bad squeegee stroke. It’s rushing the cleaning step because it feels like the “boring part” before the real work starts. Every wrinkle, streak, or trapped fleck that shows up two days later almost always traces back to something on the glass that should have been scraped off before the film ever touched it.
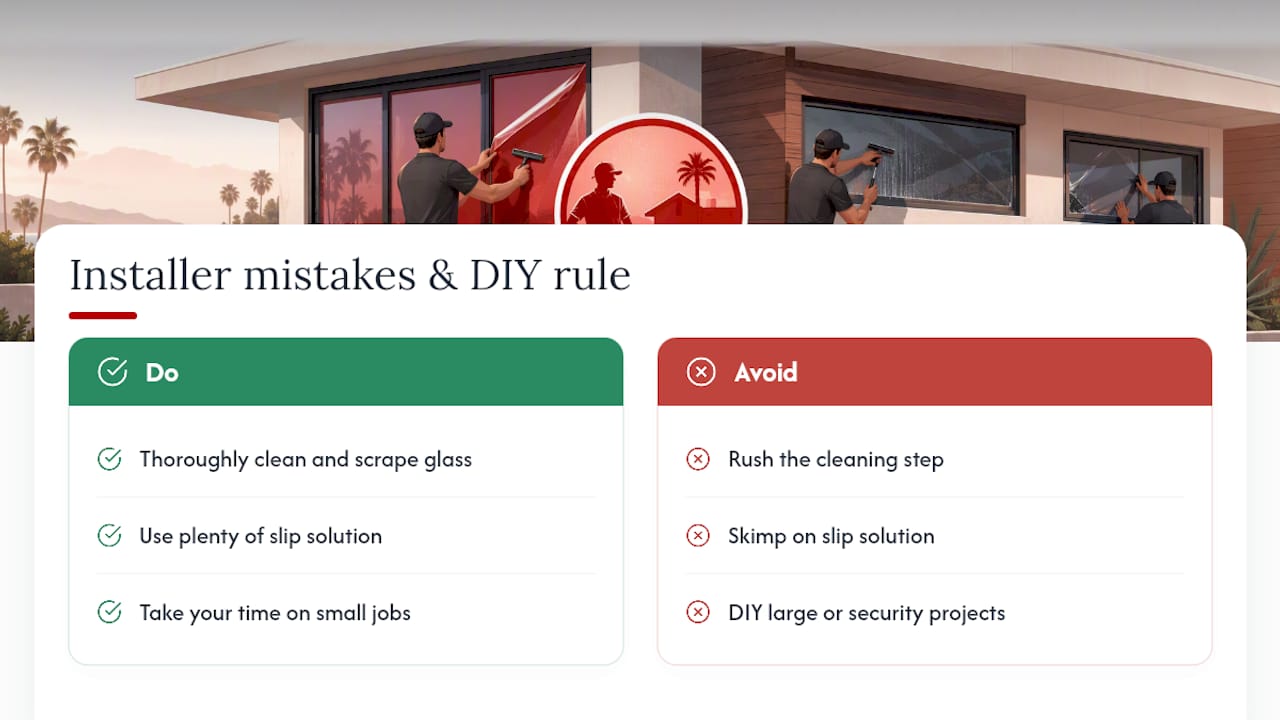
The second mistake is being stingy with slip solution out of fear of “making a mess.” More water buys you more time to fix mistakes while everything is still wet. Once it dries, your options shrink fast.
If your project is a single small window or a decorative accent panel, take your time and do it yourself. If you’re staring at a storefront’s worth of glass or a security film spec, that’s when the calculation changes.
— Jake
Sources
- How to Install Window Film | Lowe’s
- Flat glass installation — 3M technical bulletin
- How to install window film: A beginner’s step-by-step guide — Artscape Inc