

Daylight Redirecting Film: How It Works and When to Install
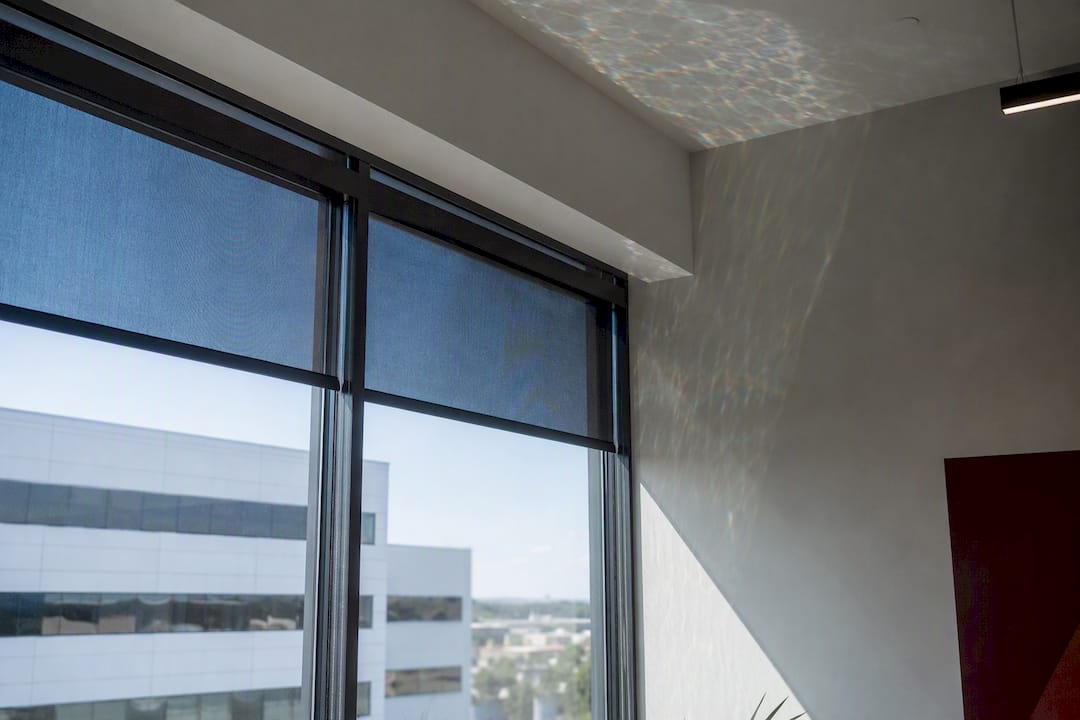
Daylight redirecting film is a micro-structured window film applied to the upper portion of glass that bends incoming sunlight upward so it lands on the ceiling and travels deeper into a room instead of pooling near the window. The main payoff: less need for electric lighting during daylight hours, softer glare, and a room that reads brighter well past the first few feet of floor space.
Manufacturer testing puts real numbers behind that claim. According to 3M’s product bulletin, the film’s micro-replicated prisms can redirect roughly 80% of incident daylight, and 3M’s own product page states that redirected light can reach as far as 40 feet into a building. What that means in practice:
- Up to ~80% of incident daylight redirected upward, per manufacturer testing
- Daylight penetration cited as far as 12 meters (40 feet) from the window wall
- Reduced dependence on electric lighting during daytime hours
- Lower glare near the glass compared to untreated windows
Key Takeaways
Daylight redirecting film works by bending sunlight upward through micro-structured prisms, cutting electric lighting use while professional installation determines whether that performance actually holds.
| Point | Details |
|---|---|
| Core mechanism | Micro-structured prisms refract or reflect daylight upward, sending it deeper into a room instead of onto the floor near the window. |
| Manufacturer performance claims | Up to roughly 80% of incident daylight redirected, with penetration cited as far as 40 feet from the window. |
| Placement is non-negotiable | Film goes in the upper 1 to 2 feet of the window, above eye level, with correct orientation and sealed edges. |
| Shades cancel the benefit | Closed interior blinds or shades block the redirected light path just as fully as they block direct sun. |
| Professional installation | Twtwindowfilm installs 3M and LLumar daylighting film across Orange County and Los Angeles County with a lifetime warranty. |
Table of Contents
- What Is Daylight Redirecting Film and How Does It Work?
- How Much Energy and Glare Reduction Can You Expect?
- Where Should Daylight Redirecting Film Be Installed?
- What Are the Limitations of Daylight Redirecting Film?
- How Is Daylight Redirecting Film Installed Step by Step?
- How Do You Maintain Daylight Redirecting Film Long Term?
- Why Professional Installation Matters for Daylight Film
- Get a Free On-Site Estimate for Daylight Redirecting Film
- Where to Verify Daylight Redirecting Film Specs
- Frequently Asked Questions About Daylight Redirecting Film
- Sources
What Is Daylight Redirecting Film and How Does It Work?
Daylight redirecting film works through micro-replication, tiny prism structures embossed into the film’s surface that bend light at a controlled angle rather than letting it pass straight through. Wikipedia’s overview of the technology describes two general approaches: refractive films that bend light as it passes through the material, and reflective films that bounce light off an internal structure toward the ceiling. Both aim at the same outcome, redirecting sunlight that would otherwise hit the floor near the window and sending it toward the back of the room.
Orientation matters more here than with most films. Because the prisms are cut to redirect light in one direction, installing the film upside down or backward can send light the wrong way entirely, so installers mark the top edge before application.
The technology has also evolved. Older daylighting setups sometimes needed a two-step system: a redirecting film on the upper window plus a separate diffusing film or a second glass lite to scatter the light evenly. Modern integrated films fold both functions into a single sheet, according to Wikipedia’s history of the product category, which cuts material costs and installation time substantially for retrofit projects.
- Refractive films bend light through the material’s structure
- Reflective films redirect light off internal micro-surfaces
- Directional prisms mean orientation is not optional
- Single-film systems have largely replaced two-pane diffuser setups
How Much Energy and Glare Reduction Can You Expect?
Treat manufacturer figures as a design target, not a guarantee for every building. The 80% redirection and 40-foot penetration numbers from 3M’s datasheet come from controlled testing conditions, and actual results shift with window orientation, ceiling height, exterior obstructions, and local sun angles throughout the year. Groups that study daylighting performance, including program summaries from E3T NW, generally recommend verifying expected gains with in-situ light measurements or a physical mockup before committing to a full building rollout.
Where the numbers do hold up, the benefits compound:
- Less reliance on electric lighting during daytime hours in daylight-adjacent zones
- Reduced glare directly at the window compared to clear or lightly tinted glass
- UV exposure reduction, since the film blocks the same UV wavelengths as most solar films
- Reported gains in occupant comfort and, in retail settings, improved product visibility near storefronts
Independent coverage from Architect Magazine backs up the comfort angle specifically, noting that daylight redirecting film helps manage both glare and solar heat gain at once, a combination that’s harder to achieve with tint alone.
Where Should Daylight Redirecting Film Be Installed?
Placement determines whether the film performs at all. 3M’s Singapore product page specifies installation on the upper portion of the window, generally starting at a minimum height of about 2 meters (roughly 6.5 feet) and never at eye level, since the redirected light angle would shine uncomfortably into occupants’ line of sight rather than up toward the ceiling.
Here’s what determines a good candidate window:
- Substrate: flat, unobstructed glass. Textured, curved, or heavily coated glass can distort the prism pattern.
- Height: installed in the upper 1 to 2 feet of a window, well above seated or standing eye level.
- Orientation: the film is directional, so the top edge must be marked and applied correctly.
- Application temperature: manufacturer bulletins specify a workable range, and installing outside it risks poor adhesion.
- Edge sealing: exposed edges get sealed to prevent moisture intrusion and lifting over time.
Pro Tip: If a window already has interior shades or blinds that get drawn during the day, ask whether they’ll stay open during working hours. A closed shade blocks the redirected light path just as completely as it blocks direct sun, which erases the benefit you paid for.
What Are the Limitations of Daylight Redirecting Film?
DRF isn’t a universal fix, and a few scenarios routinely disappoint building owners who didn’t plan around them.
- Direct sun hitting the film within a few degrees of a steep angle can create localized glare or a hot spot right near the glass, even while the rest of the room benefits.
- The prism structure gives the film a frosted, etched appearance that some tenants or homeowners find visually different from clear glass, which is worth discussing with occupants before installation. If aesthetics are a concern, pairing DRF placement with a decorative or frosted film below it can create a more cohesive look.
- Low windows, heavily shaded façades, or windows that sit under deep overhangs won’t generate meaningful redirection because there’s not enough direct daylight hitting the upper glass to begin with.
- Interior shades and blinds, as mentioned above, can fully negate the film’s performance if they’re kept closed during daylight hours.
How Is Daylight Redirecting Film Installed Step by Step?
A clean installation follows a fairly consistent sequence, whether the job is a single office window or a full storefront retrofit.
- Measure and precut the film, leaving a 1 to 2 millimeter gap from the frame edge to allow for expansion.
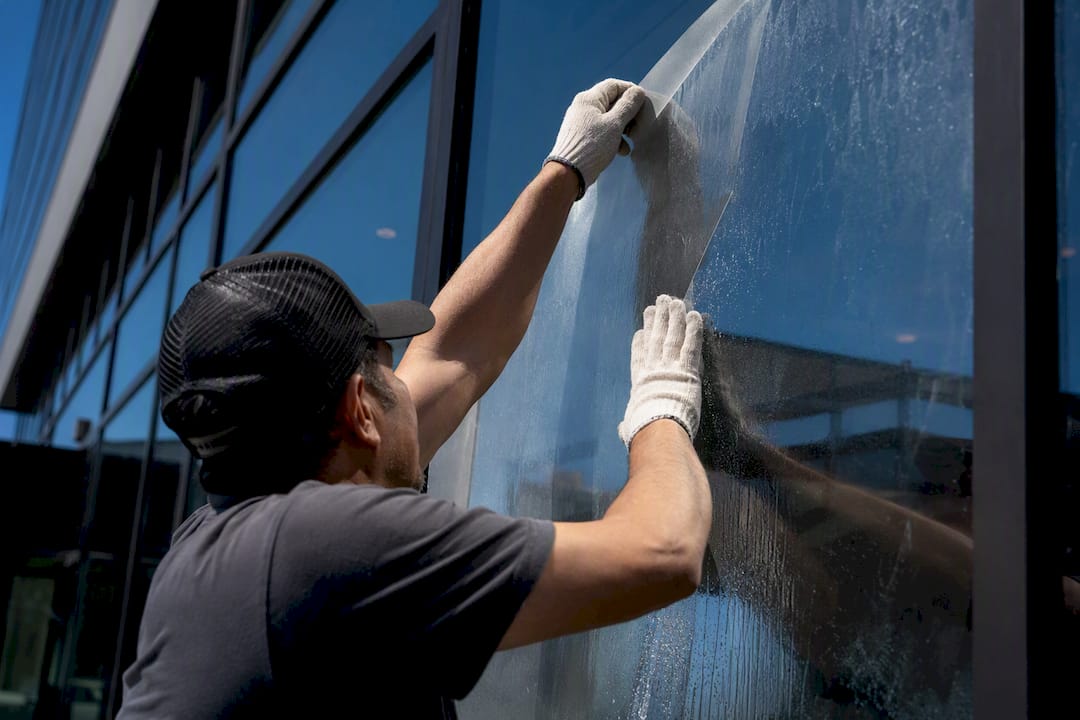
- Mark orientation on the liner before removing it. A small notch cut into the upper corner prevents mix-ups once the liner comes off and the film is wet with slip solution.
- Apply with slip solution, positioning the film against the glass while it can still shift slightly for alignment.
- Squeegee out the solution and air bubbles using firm, overlapping passes from center to edges.
- Seal the edges with a manufacturer-specified sealant, such as 3M 3950, allowing the short drying window recommended before a final squeegee pass.
- Check adhesion across the full surface, confirm no debris got trapped underneath, and verify no shade or blind will interfere with the finished light path.
Pro Tip: Edge sealing gets skipped more often than any other step on this checklist, mostly because it looks optional once the film already looks stuck down. It isn’t. Skipping it invites moisture under the edges months later.
How Do You Maintain Daylight Redirecting Film Long Term?
Daylight redirecting film needs gentler care than standard glass. Skip ammonia-based cleaners and abrasive pads. A mild soap solution and a soft cloth or squeegee is enough to keep the surface clear without scratching the prism structure.
- Avoid razor blades or rough scrapers directly on the film surface
- Expect final adhesion to take several weeks depending on temperature and humidity, even though the film looks fully set within a day or two
- Stay within the manufacturer’s stated service temperature range for the life of the installation
- Contact a professional installer if you notice edge lifting, bubbling, or a change in how light behaves near the film. Those symptoms usually point to a sealing issue rather than a defect in the film itself
Why Professional Installation Matters for Daylight Film
Daylight redirecting film only performs as advertised when orientation, height, and edge sealing are all correct, and getting one of those wrong on a commercial building means redoing work at height, often on occupied space. Twtwindowfilm has installed film across Orange County and Los Angeles County commercial and residential properties since 2008, backing every job with a lifetime warranty. Partnerships with 3M and LLumar mean access to tested, spec-grade materials rather than generic film sold without performance documentation, which matters most on a product where the prism geometry has to be right the first time.
Get a Free On-Site Estimate for Daylight Redirecting Film
If the placement rules and orientation requirements above sound like the kind of detail you’d rather not troubleshoot yourself, that’s the exact gap Twtwindowfilm fills. Certified installers handle the measuring, orientation marking, wet application, and edge sealing so the film performs at the height and angle it was engineered for, backed by a lifetime warranty on the work.

Twtwindowfilm offers free on-site estimates across Orange County and Los Angeles County for commercial and residential daylighting projects, including retail storefronts where glare control and improved sightlines matter for both staff and shoppers (storefront window film). Facility managers evaluating a larger rollout can start with a walkthrough of the full range of services to see which film and installation approach fits the building’s window mix. Request your estimate and get a specific recommendation for your windows before committing to a product.
Where to Verify Daylight Redirecting Film Specs
For technical specifics beyond this guide, check the 3M Daylight Redirecting Film product bulletin for application temperatures and edge-sealing guidance, 3M’s Singapore product page for installation height recommendations, and Wikipedia’s overview for a plain-language explanation of refractive versus reflective designs.
Frequently Asked Questions About Daylight Redirecting Film
Can daylight redirecting film go on any window? No. It needs flat, unobstructed glass, and it only works when installed in the upper section of the window, above eye level. Low windows or heavily shaded façades won’t generate enough usable daylight to redirect.
Does daylight redirecting film block UV rays? Yes, most daylight redirecting films block a substantial share of UV wavelengths, similar to standard solar control films, which helps protect flooring and furnishings from fading.
Will daylight redirecting film make my window look frosted? The prism structure does give the film a textured, semi-opaque appearance rather than a fully clear look. Many building owners pair it with a matching decorative film lower on the glass for visual consistency.
How long does it take daylight redirecting film to fully cure? Full adhesion can take several weeks depending on temperature and humidity, even though the film appears set within a day or two of installation.
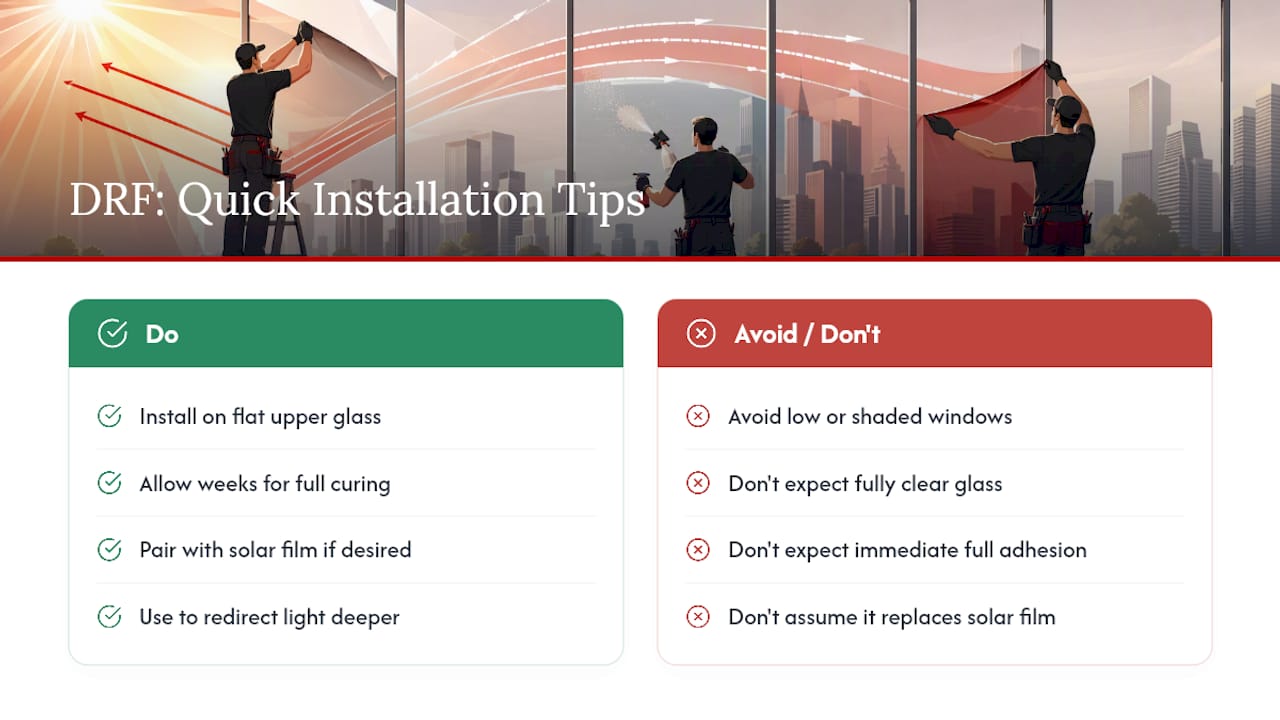
Is daylight redirecting film worth it if I already have solar window film? It depends on your goals. Solar film primarily manages heat and glare uniformly across the glass, while daylight redirecting film specifically aims redirected light deeper into the room, so the two can complement each other on different sections of the same window.
Sources
- 3M™ Daylight Redirecting Film Product Bulletin (datasheet)
- 3M™ Daylight Redirecting Film | 3M India
- Daylight redirecting film — Wikipedia
- 3M™ Daylight Redirecting Film, 48 in x 50 ft | 3M Singapore